This page contains User Instructions on how to use the JupyterHub environment on Snellius. This environment is hosted at surf.nl, using a typical URL https://jupyter.snellius.surf.nl/<coursename>.
First time setup
Receive login credentials
Before you start, you will receive an email containing your login-ID. The e-mail will look like the following:
| From: | no-reply@surf.nl |
| Subject: | SURFcua new login scurXXXX created |
| Message: | Dear XXXX |
In addition, you will get an e-mail with a link with which to set your password:
| From: | no-reply@surf.nl |
| Subject: | SURFcua Update Your login |
| Message: | Dear XXXX, This a message for the SURFcua login scurXXXX. Your administrator has just requested that you update your login by performing the following action(s): Update Password. Click on the link below to start this process. This link will expire within 12 hours. If you are unaware that your administrator has requested this, just ignore this message and nothing will be changed. Regards, SURFcua Team For more information also check our information on the servicedesk at https://servicedesk.surf.nl |
The link in this e-mail allows you to choose a password for your login, but it is only valid for 12 hours.
What if my 12-hour activation link expired?
If you have missed the 12-hour window, you can request a new password link yourself by following the instructions here.
Accepting usage agreement
Before logging in, you will need to accept the Usage Agreement;
This can be done at https://portal.cua.surf.nl/. Please select "Usage Agreement" at the top, or "View usage agreement" link in the center. Either one will take you to the page where you can accept the usage agreement.

REMINDER: Though you can login to the Jupyter Hub without having accepted the Usage Agreement, you will not be able to launch a Jupyter Notebook server. Therefore don't forget to accept the Usage Agreement. |
Password reset / forgot password
You can reset your password by following the instructions here.
JupyterHub
Logging in
Each course uses it's own Jupyter Hub. The Jupyter Hubs are running at https://jupyter.snellius.surf.nl/<coursename>. The <coursename> will be provided to you by your teacher. After going to the web URL, you will see the following login screen:

Use the login name and password you received to login.
Profile selection
After logging in, you will see the following screen:

You are now in the Jupyter Hub. The Jupyter Hub can be used to start a Jupyter Notebook Server. To do this, there are two profiles:
- one 'outside course work' (or 'homework') profile
- one 'course' profile.
The descriptions are quite self explanatory: the first one is meant for outside course hours, the others are meant to be used during course hours. To start a Jupyter Notebook server, select the desired profile, and click 'Start'.
Outside course hours, only a limited number of slots are available to start Jupyter Notebook servers. This means not all students can run Jupyter Notebooks at the same time. Usually, this should not be a problem, but if many other students are already working, trying to start your notebook may result in a timeout. If that happens, there are no more slots available, and you will have to wait until another student finishes his/her session.
The course hours profile will start a Jupyter Notebook Server in a reservation that is large enough to accommodate all students at the same time. This reservation is present only during pre-specified course hours, hence it is important to select the right profile.
Logging out from the JupyterHub environment
You can log out from the JupyterHub environment, by using the Logout ![]() button in the top-right corner.
button in the top-right corner.
Jupyter Notebook Server
After launching a Jupyter Notebook server, you should see something similar to the following screen

where your teacher might have already prepared some material for you to work with (in this example 'Course_01.ipynb' and the 'Example_folder').
This view shows the files and folders present in your home directory.
Basic navigation
You can browse through the folders or open files by clicking on them. In the example below, we clicked the folder 'Example_folder' and see that it is emtpy. To go back up to a higher level folder, click the '..' after the first folder in the list.

Note that in a Jupyter environment, you can only open plain text files and notebooks.
Create/move/remove folders
To create a new folder inside the 'Example_folder', click the 'New' button in the top right corner. By default, this will create an Untitled folder

You can change the name by selecting the checkbox in front of the folder and click 'rename'

In the same way, by selecting the checkbox in front of the folder, you can move it (by clicking the 'Move' button), or remove it (by clicking the trash bin).
WARNING: there is no way to restore removed files or folders, so be careful with what you remove.
Create/move/remove files
There are a few ways to create new files.
- Click 'New' in the top right and start a notebook (in the example below, a Python 3 or R notebook). This will start a notebook, which will automatically create an 'Untitled notebook' file that you can rename later (in the same way as you rename a folder).

- Click 'New' in the top right, and start a Text file. This will automatically create an 'Untitled' text file, that again you can rename (in the same way as you rename a folder).
Upload files
To upload a file, press the 'upload' button in the top right
- Upload a file (or multiple files) by clicking the 'Upload' button in the top right.
- From the window that opens, select the files on your local machine that you want to upload and click 'Open'. Note that you can select multiple files by holding the 'control' (on Mac: command) button and clicking.
- Finally, click the blue 'upload' buttons to upload the files (see image below).

Download files
To download a file, select it, and press the download button:

Unfortunately, it is not possible to select multiple files and download them all at once. This is a general limitation of Jupyter Notebook Servers.
Shutting down your Jupyter Notebook Server
Your Jupyter Notebook server will remain running, even if you close your browser tab, or log out from the JupyterHub. This allows you to reconnect to a running notebook when e.g. your internet connection is shortly interrupted. For the homework profile, an inactivity timeout is active that will make sure that a Notebook server remains idle for a while (5-10 minutes or so) will shutdown automatically. This timeout is not in place for the course profile; here your notebook will be automatically shutdown at the end of the course hour reservation.
You can also shutdown your server manually. This opens up a slot for other notebooks immediately, which will be appreciated by your fellow students when all slots in the homework profile have been filled up. To shutdown your notebook, click the "Control Panel" button in the top right, and then click the "Stop My Server" button:

Note that it may take around 10 seconds for the server to be stopped. If you don't see changes, try refreshing the page.
Jupyter Notebooks
Starting a notebook
As said, one of the ways to create a new file is by starting a notebook through the 'New' menu on the top right. In the 'New' menu, all Notebooks that can be started are show under the 'Notebook' header. In this example, you can see that the currently running Jupyter Notebook server supports Python 3 and R notebooks. Note that you may see other Notebooks apart from these two: in that case SURF or your teacher has installed additional Notebooks that can be started.
When you start a new Notebook, a new tab opens in your browser, that shows the running Notebook. For example, in an empty notebook, you would see:
![]()
Running code
A Jupyter Notebook is essentially en environment in which you can combine text, code, and output. For this section, we will assume you are running a Python Notebook, so we will write Python syntax. As a simple example, we can write code that adds two numbers:

There are multiple ways to execute this code. The first option is to go simply select the cell you want to run, and press 'Run'. Another option is to go to the 'Cell' menu, and click on of the 'Run' options. If you hover over these menu items, a tooltip will explain exactly what each item does.

Finally, you can run cells using shortcuts. For example, to run the current cell, press shift + enter. Note that there are many more shortcuts; you can click the keyboard icon to see a full list.
After running the cell, we also see the output
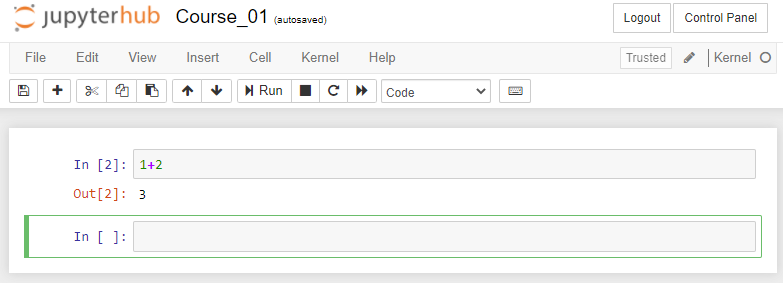
A new code field has automatically appeared in this case. You can also add new code fields by pressing the '+' button, or cut, copy and paste code fields with the corresponding buttons. With the arrow buttons, you can move the current code cell up or down.
Monitoring resource usage
When viewing a notebook, the top-right corner displays your current CPU usage, and current memory usage. The CPU usage is displayed as a percentage of the total amount of CPU available to your Jupyter Notebook Server (you can ignore the number between brackets). Memory usage is shown as a fraction of the maximum memory available to your Jupyter Notebook Server. If you are running multiple Jupyter Notebooks simultaneously, the CPU and memory meters show the aggregate usage of those Jupyter Notebooks. If you run into out-of-memory issues, try closing the Notebooks you are not actively working on (see "Closing your Notebook" below).

Interrupting a calculation
You may want to interrupt a calculation, e.g. because it is taking very long and you found out you made a mistake in your code. You can either press the 'stop' button, or go to the 'Kernel' menu and press 'Interrupt'.

Restarting the kernel
Sometimes, you may also want to restart the 'Kernel'. The Kernel keeps all your variables in memory. While you can always override existing variables that you have assigned, maybe you want to be sure to get a 'clean' start (for example to test if your complete Notebook runs without errors). In that case, you can restart the kernel with the circular arrow button, or by going to the 'Kernel' menu and pressing 'Restart'.
Writing text
You can convert the current cell to a text cell by going to the dropdown menu that says 'code' and change it to 'Markdown'.

Now you can type text in a markup language called 'Markdown'. For example, to create a header:

Now, when we execute this cell (just like we would execute code), the text will be formatted:

For more information on how to write formatted text in Markdown, search the web for a Markdown tutorial.
Saving your notebook
While Jupyter Notebook will autosave your notebook at regular intervals, it is good practice to save your notebook regularly yourself. You can save it under the current name with the floppy disk icon on the left. If you want to save your notebook under a different name, you can go to the 'File' menu and click 'Save as'.
Closing your notebook
Go to 'File' and click 'Close and Halt'. This will stop the notebook and close the current browser tab. After shutting down, all objects in memory will be deleted, so the next time you start your notebook, you would have to re-execute the cells (though of course any printed output will still be there, even without re-executing).
Note that if you just close your tab without shutting down the notebook, the notebook will keep running. This is indicated by the green icon and the 'Running' word in the browser view.

It's not a big issue if a notebook is still running, it means you can continue with it where you left off (though all notebooks will be shut down once the Jupyter Notebook server shuts down). It does however mean that your notebook will still consume memory. If you have many (large) notebooks simultaneously in a running state, you may run out of memory. To avoid this, either open it again, and go through the 'File' menu to 'Close and Halt' your notebook. Or, from the browser view, you can select the checkbox in front of the notebook, and press 'Shutdown'.

Alternatively, go to the 'Running' tab for an overview of all your running notebooks, and shut it down there by pressing the 'Shutdown' button:

Running batch jobs from the Jupyter environment
If this was pre-arranged for your course, you can submit batch jobs to the HPC cluster that is also running the Jupyter environment.
Create the batch job
First, you'll need to create a batch job. You can do this by going to 'New' and click 'text' to open a text document. The full details on how to create a batch job can be found at Creating and running jobs . Here, we will just provide one example to show how to make sure to make the same software environment available in the batch job as in the Jupyter course environment. This example batch job submits to a the GPU partition, and allocates a quarter GPU node (1 GPU, 18 CPU cores and around 124 GB memory):
#!/bin/bash
# The above SBATCH commands allocate a quarter GPU node. # This job is submitted to a reservation with the --reservation argument # Once the job is allocated on the GPU node, there, it will run the commands # Load the same software environment as in the JupyterHub # You'll need to replace the XXXYYY by the course identifier for your course # that is also used in the link you use to go to the JupyterHub web page # Run your python script |
Submit the batch job
Go to 'New' and click 'Terminal'. Then, submit the job by executing
sbatch <name_of_job_script> |
The output (that would normally appear in your terminal) will be stored in an outputfile 'slurm-<jobid>.out'. You can run the 'squeue' command to check if your job is still waiting in the queue or running.