Manual SSH tunnel setup
Linux, macOS
To set up an SSH tunnel for accessing a VNC server under macOS or Linux, you simply have to open a terminal window and run an ssh -L command. In general, it looks like this:
workstation$ ssh -L 5901:<node>:5901 <user>@<system>
Here, node is the compute node on which your VNC server runs, <user> is your username and <system> would be snellius.surf.nl.
A concrete example:
workstation$ ssh -L 5901:gcn5:5901 paulm@snellius.surf.nl
This uses the ssh command to set up an encrypted tunnel that forwards TCP port 5901 on your local machine to port 5901 on the GPU node gcn5 on Snellius, using the interactive node snellius.surf.nl as access point. In most cases TCP port 5901 needs to be tunneled, which corresponds to VNC display :1 (port 5902 would correspond to display :2 , etc).
After executing the command above the SSH tunnel will have been set up and you will be logged into one of the login nodes. Leave the terminal window with the tunnel command open, as closing it will also close the SSH tunnel.
With the tunnel created we can now use a VNC viewer to connect to localhost:1 , which is the local endpoint of the SSH tunnel (VNC display :1 will get translated into port 5901). The VNC viewer will then ask for your user/password to connect to the VNC server, after which the connection to the remote desktop on the GPU node will be complete.
Windows
Microsoft Windows does not have built-in SSH capabilities, the best option is to first download the Plink tool (which is part of the PuTTY software). At http://www.chiark.greenend.org.uk/sgtatham/putty/download.html you can find the download link to plink.exe. An alternative is to install TurboVNC and use its Java-based viewer, which comes with builtin SSH tunnelling, see below.
Next, start a command prompt (Windows-button + r, type cmd, press enter). In the command prompt, navigate to the location where you saved plink.exe, use the command line you got when you started the server but use plink.exe instead of ssh as the command. It then should look something like this:
plink.exe -L 5901:gcn5:5901 paulm@snellius.surf.nl
Automatic SSH tunneling on Linux and macOS: the -via option
Some VNC clients, most notably TigerVNC and TurboVNC , offer a handy -via command-line option that performs the SSH tunneling step shown above for you automatically. The -via option is usually only available on the Linux and macOS versions of those VNC clients.
In case of the Linux/macOS example shown above the command to start the VNC client using the -via option would reduce to:
workstation$ vncviewer -via paulm@snellius.surf.nl gcn5:1
The VNC client in this case will set up the appropriate SSH tunnel itself, followed by making a connection to the VNC server through the tunnel.
You will be prompted to enter a password twice:
- First, for setting up the SSH tunnel your regular CUA login password is needed (the same one as you use for accessing a login node)
- Second, the password for connecting to your VNC session: enter your regular CUA credentials, i.e. username and password
Automatic tunneling in Java TurboVNC Viewer
This section only applies to the Java version of the TurboVNC viewer. The native (Windows) version does not offer the builtin tunneling option. The native version is also scheduled to be deprecated starting with TurboVNC version 3.
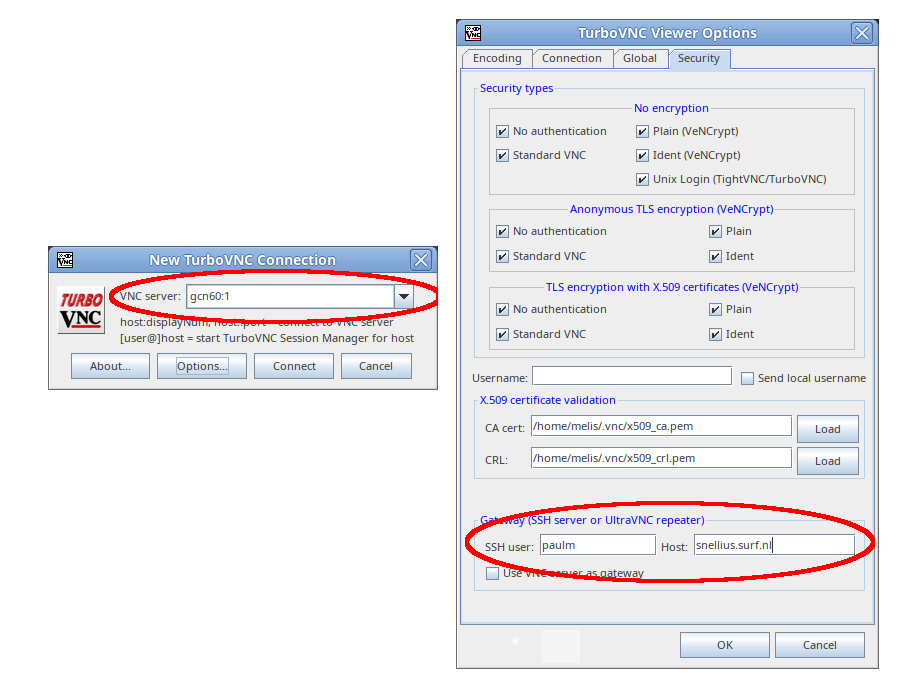
The Java TurboVNC Viewer, which is available on Windows, macOS and Linux, has builtin support for SSH tunneling. From within TurboVNC it is straightforward to make a tunneled connection:
Start the Java TurboVNC Viewer
- Click the
Options...button and switch to theSecuritytab - Under
Gateway (SSH server or UltraVNC repeater):- Enter your CUA username under
SSH user - Enter the name of the login node under
Host. This should belisa.surfsara.nlfor Lisa,vis.cartesius.surfsara.nlfor Cartesius - Leave
Use VNC server as gatewayunchecked
- Enter your CUA username under
- Close the Options window with
OK - In the main connection window enter the node and VNC display on which the VNC server is running.
For example, to continue the example above to connect to a VNC server running on r34n4 on Lisa, the filled-in values would look like this:
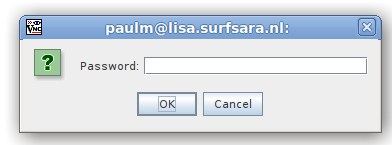
After clicking Connect the next window shown is to enter your password to log into the login node (as shown in the window title), enter your CUA password here:
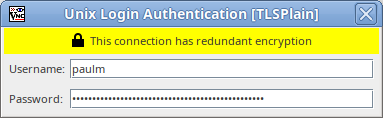
Finally, another user-password window is shown, which is used to make the connection to the VNC server (through the SSH tunnel which has been set up at that point):
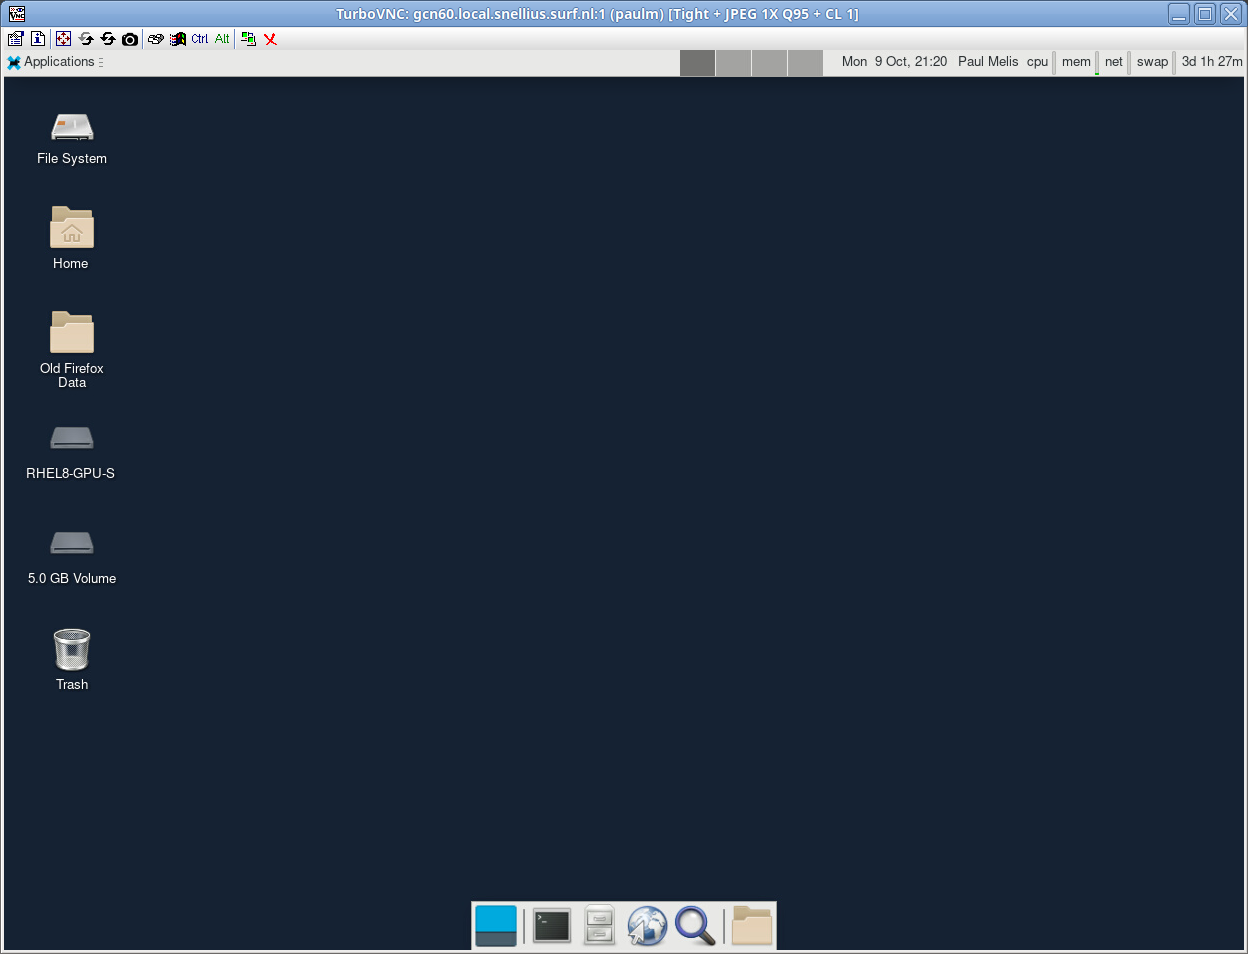
After entering your credentials and pressing Enter the VNC remote desktop will now be accessible:
The above setup is quite convenient, as you can keep the tunneling settings on the Security tab filled in, while only the compute node on which the VNC server is running needs to be entered in the main window.