The local storage of any workspace you create will be gone when you delete the workspace.
In order to make your data outlive the workspace's life cycle, you need persistent storage.
Research Drive, is a very flexible and comfortable solution to this.
...
External storage volumes are not only persistent, but also fast enough for I/O-intensive
...
computing tasks.
The
...
"external" storage volumes on SURF Research Cloud are located inside the
...
respective cloud provider's infrastructure and thus perform well together with workspaces that run there.
You can attach such a volume
...
during the creation of a new workspace
...
.
Being persistent storage, all the data that has been written to the volume by that workspace will still be present, also after the workspace is gone.
This means that the storage already must exist, when the workspace is created.
You may also attach and detach storage later on. (See at the bottom of this page.)
Why not just use Research Drive?
Research Drive can be attached to a workspace and is a great solution for managing and sharing data.
But it is more suitable to use external storage volume in the case of I/O-intensive tasks, where a lot of data has to be read and written quickly.
Step 1: Create
...
a volume
Creating such a volume follows the same logic as creating a workspace.
...
(You can also select the "Storage"-tab in the lower half of the dashboard and click on the green "+" on the right.)
Choose the "Storage HPC" item. a storage solution of one of the cloud providers, then. The cloud provider should be the same as the one you will run your workspace on.
Then click "CONTINUE".
Anchor storageOrganisations storageOrganisations
| storageOrganisations | |
| storageOrganisations |
Step 2: Select the CO
In the next step, you get to select for which of your COs you want to create the volume.
This choice, too, will have to match the workspace you intend to create.
Choose the CO you want and click "CONTINUE".
If you are a member of only one collaboration it will be automatically selected, and this step will be skipped.
Anchor storageWallets storageWallets
| storageWallets | |
| storageWallets |
Step 3: Wallet
If you have multiple wallets, in this step you can choose which wallet will be charged for running the workspace. If you have only one wallet it will be automatically selected, and this step will be skipped.
Anchor storageApplications storageApplications
| storageApplications | |
| storageApplications |
Step 4: Choose the type of storage
In this step you can choose the storage options that you can launch. Which storage options are available to you depends on your collaborative organisation memberships.
Anchor storageClouds storageClouds
| storageClouds | |
| storageClouds |
Step 5: Cloud provider and size
The next step requires three two choices. You can choose
...
- which cloud provider the volume will run on (the only choice is SURF HPC, obviously)
- which flavour (aka "size") the volume will have (remember that a bigger volume will use more of your budget)
When all choices are made, click "CONTINUE".
Anchor storageName storageName
| storageName | |
| storageName |
Step 6: Volume name and confirmation
Just like in workspace creation you now can enter a name for the volume that should be unique and makes sense to you and your CO-colleagues.
On the left side of the window you will see an overview of the configurations of your volume. The "edit" button on the left side of each section lets you modify your selections.

Accepts Accept the terms and conditions and click on "SUBMIT" to actually create your volume.
...
Here you can see the volume being created.
Attaching the volume to a workspace
As soon as the state of the volume is signaled to be "availiableavailable", you can attach your volume to a (newly created) workspace.Please note that the application that you choose for the workspace should be enabled to handle storage volumes.Refer to the application's description to find out.
You can start your workspace as specified here. The only difference being that you will see your volume in the second last step of the creation-process.
...
As soon as the new workspace has entered the "creating" state, you will also see that the state of the attached volume has changed to "in-use".
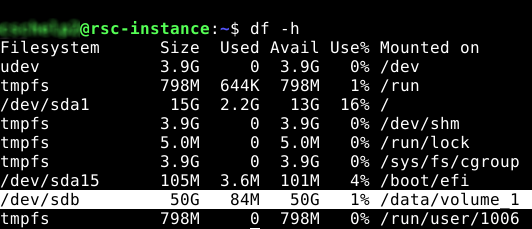
The volume is mounted to a directory "~/data/<volume name>" (in the current user's home directory).
"<volume name>" is a sanitized version of the the name that the volume received when it was created.
The volume will only be available for another workspace, when it is detached from the current workspace or when the current workspace is deleted.
| Info |
|---|
In some rare cases you may need Research Cloud to follow the old naming convention of "~/data/volume_2", "~/data/volume_3", [...] Please refer to this page to see how to make a catalog item use the legacy convention. |
Attach/Detach Storage
With workspaces and volumes created after February 2024 you can attach and detach volumes to and from existing workspaces.
To do this, extend the display of the workspace and pause the workspace.
Select the "Storage" tab.

In this example, "Storage A" is already attached to the workspace.
You could detach it by clicking the "unlink" symbol on its right.
Click the "+" symbol to attach another storage volume.
You will be prompted to select one of the storages that is available for this workspace.
"Available" here means "same CO", "same cloud provider" and not yet attached elsewhere.
A storage volume can only be attached to one workspace at a time.
| Info |
|---|
At the moment the Attach/Detach Storage functionality is not available for for workspaces on the Oracle cloud provider |