This documentation is derived from https://www.uu.nl/en/research/yoda and adjusted to Yoda hosted at SURF.
You can upload and download data to and from Yoda by using the Yoda Network drive on your laptop or PC. This will add a network drive to your computer that contains your research data. Once the Yoda network drive has been configured, you can use your existing applications and tools to work with the data. See Yoda Hosting (URLs) for looking up the correct URL to use for the Yoda network drive.
Credentials
To access Yoda via the network drive, a Data Access Password is required (How to get a Data Access Password).
The Data Access Password must be entered when a password is requested.
For Windows users:
Mapping the network drive
Open “This PC” from the Start menu

Open the Computer menu item and select “Map network drive”.

Select a drive letter — any free letter is okay. Now enter the server address of the environment in the Folder field (see Yoda Hosting (URLs)).

Ensure the box “Connect using different credentials” is checked and click on the "Finish" button.

You will be prompted for a name and password. If you are working on your personal PC or laptop, tick the checkbox “Remember my credentials”. If you are working on a shared computer, it is better not to tick this checkbox for security reasons. Click on the "OK" button.
The Explorer screen will show the folders you have access rights to. You can now drag and drop your files to upload or download them.
Increasing maximum file size
By default, the native WebDAV client only works with files smaller than 50 MB. You can increase this limit to 4 GB if you have a local administrator account:
- Open the registry editor by pressing the start button, entering “regedit” and pressing the enter key
- If you are asked whether the registry editor should be allowed to change the system settings, confirm
- Navigate to key HKEY_LOCAL_MACHINE\SYSTEM\CurrentControlSet\Services\WebClient\Parameters
- Open the FileSizeLimitInBytes key

- Set it to FFFFFFFF (hexadecimal)

- Click on the "OK" button and close the registry editor
- Restart your computer
For Mac users:
You can open the Yoda Network drive using the Finder app. By default, the Finder icon is shown in the bottom left corner of your screen (in the Dock). Click on this icon.
If you don’t see the Finder icon, you can alternatively start Finder by pressing the command key and the space bar, typing “finder” and pressing enter.
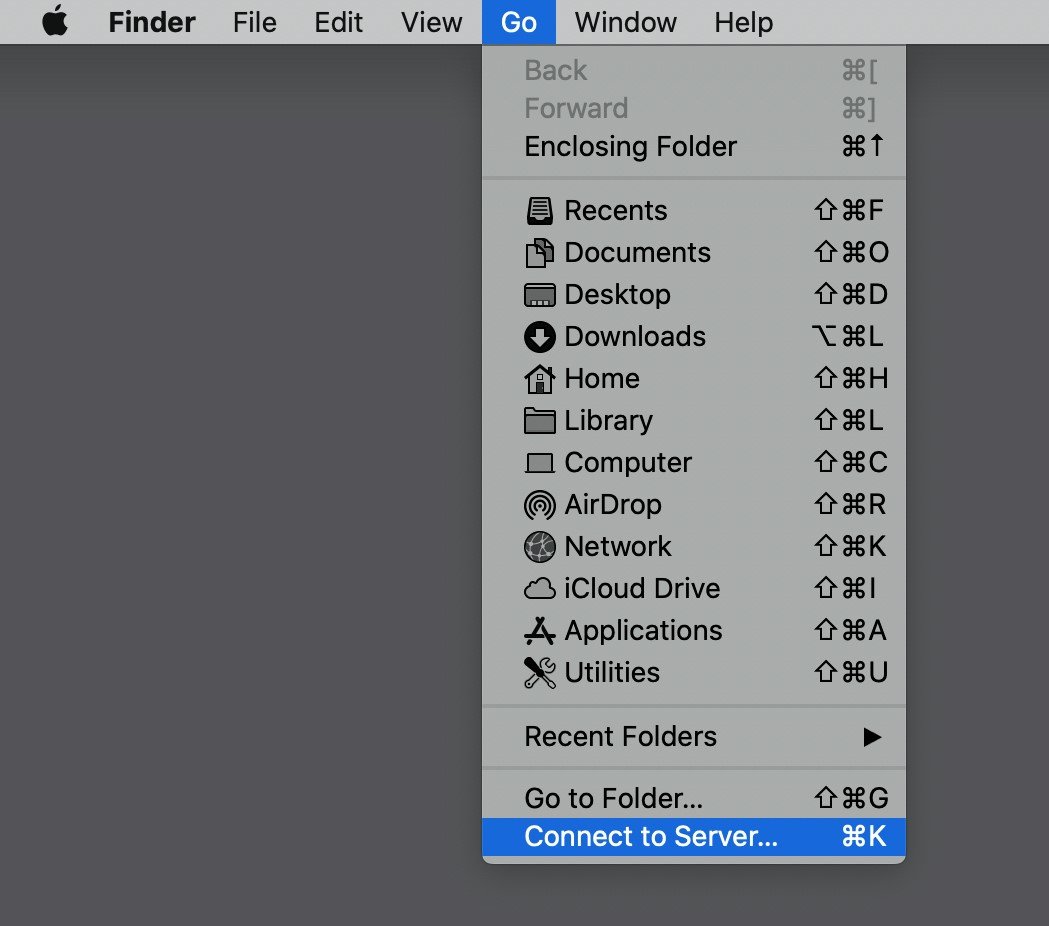
Now press the command key and the "K" key to connect to the Yoda server. You should now see this dialog:
Enter the server address of your environment, see Yoda Hosting (URLs).
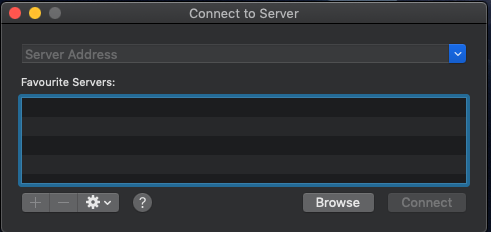
The Finder app will show a confirmation dialog, similar to the one below. The address shown in the dialog should be the address you entered in the previous dialog.
Press the Connect button.

You should now see a credentials dialog. The “Connect as” setting should be set to “Registered user”. Tick the checkbox “Remember this password in my keychain”. Click on the connect button.
You should now have a new Yoda network drive location in Finder. Its name is the network address you entered before. You may have to scroll down in finder in order to see it.
For Linux users:
GNOME users can connect to the Yoda Network drive using GNOME Files (also known as Nautilus in older versions of GNOME). Alternatively, if you are comfortable with using command line tools, use davfs2 to mount the Yoda network drive. The Cadaver command line WebDAV client is also compatible with the Yoda network drive.
Connecting using GNOME files
GNOME users can connect to the Yoda network drive with GNOME Files (also known as Nautilus in older versions of GNOME).

Click on “+Other Locations” and enter the server address in the “Connect to Server” bar, see Yoda Hosting (URLs).
Then click on the Connect button.

You will be prompted for a name and password.

Connecting using davfs2:
This page describes how to connect to the Yoda network drive on a Linux system using davfs2. It assumes familiarity with using command line tools. The instructions are suitable for RedHat-based distributions (e.g., Fedora or CentOS) and for Debian-based distributions (e.g., Ubuntu).
Installing the package
Install the davfs2 package.
For Debian/Ubuntu:
- sudo apt -y install davfs2
- Confirm that unprivileged users should be able to mount davfs2 volumes ("Yes").
For RedHat/CentOS/Fedora:
- sudo yum -y install epel-release
- sudo yum -y install davfs2
Configuring group membership
Look up your user name, uid and gid using the “id” command.
Add your user account to the davfs2 group: sudo usermod -aG davfs2 user (replace "user" with your username).
Close the terminal window and open a new one to activate the group change.
Configuring Davfs2
Open the davfs2 config file in a text editor (e.g., sudo vi /etc/davfs2/davfs2.conf). Ensure parameter delay_upload is set to 0 (zero). This limits the risk of data loss from a failure to flush data after large file transfers.
Look up the Yoda network drive URL of your Yoda environment.
Open the /etc/fstab file in a text editor (e.g., sudo vi /etc/fstab) and add a configuration line for the Yoda network drive:
https://surf-data.irods.surfsara.nl /mnt davfs user,auto,uid=1000,gid=1000 0 0
And adjust the parameters as needed:
- Replace https://surf-data.irods.surfsara.nl with the URL of your Yoda network drive, see Yoda Hosting (URLs).
- If you’d like to mount the Yoda network drive in a different location, replace /mnt with a different local directory.
- Replace the uid and gid parameters with your uid and gid, as shown by the id command.
- If you don’t want the Yoda network drive to be mounted automatically after your system starts, remove “auto,” from the options.
Now use a text editor to create a secrets file, which contains your Yoda network drive URL, Yoda username and password, separated by spaces. Example of a secrets file: “https://surf-data.irods.surfsara.nl j.jansen@uu.nl mySecretPassword”. You need to escape any backslashes and double quotes in your password with a backslash (e.g. use "\\" instead of "\").
Install this secrets file as the global davfs2 secrets file:
- sudo install -m 0600 -o root -g root secrets /etc/davfs2/secrets
- rm secrets
Mounting the Yoda Network drive
The drive should be mounted automatically after a reboot if you have configured the "auto" option in /etc/fstab.
To manually mount the Yoda network drive:
- On Debian/Ubuntu: mount /mnt
- On RedHat/CentOS/Fedora: sudo mount /mnt (you can ignore any warnings about writing to the mtab file)